In today’s competitive freelance market, having an effective online presence is crucial. A well-designed landing page can be the difference between converting visitors into clients or losing them to competitors. Elementor, a powerful WordPress page builder, offers freelancers the tools to create stunning, high-converting landing pages without needing extensive coding knowledge.
In this guide, we’ll explore how to Use Elementor for creating high-converting landing pages for freelancers, ones that attract clients and boost your business.
Understanding the Importance of Landing Pages for Freelancers
Before diving into the specifics of Elementor, let’s discuss why landing pages matter. A landing page is a standalone web page designed for a specific purpose, often used to capture leads or promote a particular service. For freelancers, this can mean showcasing your skills, offering a lead magnet, or inviting potential clients to book a consultation.
Key Benefits of a High-Converting Landing Page
- Focused Messaging: Unlike a general website, landing pages can deliver targeted messages that speak directly to your audience’s needs.
- Increased Conversions: A well-optimized landing page can significantly increase conversion rates by guiding visitors toward a specific action.
- Lead Generation: By incorporating forms and offers, landing pages can help you capture valuable leads for your freelance business.
Getting Started with Elementor
Elementor is a drag-and-drop page builder for WordPress that allows users to create custom web pages without writing code. With its intuitive interface, you can design stunning pages using various pre-made templates and widgets.
Setting Up Elementor
- Install WordPress: Ensure you have a WordPress website set up. If you don’t have one yet, choose a hosting provider and follow their setup instructions.
- Install Elementor:
- Go to your WordPress dashboard.
- Navigate to Plugins > Add New.
- Search for “Elementor” and click Install Now.
- After installation, click Activate.
- Familiarize Yourself with the Interface: Once activated, you’ll see a new menu option for Elementor in your dashboard. Click on it to explore templates, widgets, and settings.
Defining Your Target Audience
Before you start building your landing page, it’s crucial to define your target audience. Consider the following questions:
- Who are you trying to reach? Are you targeting small businesses, startups, or individual clients?
- What problems do they have that you can solve? Understanding your audience’s pain points will help you tailor your messaging and offerings.
- What action do you want them to take? Whether it’s signing up for a newsletter or booking a consultation, be clear about your goal
Crafting a High-Converting Landing Page
Essential Elements of a High-Converting Landing Page
Before diving deep and see how to use Elementor for creating high-converting landing pages for freelancers, we need to first understand what makes an effective landing page. You’ll need to incorporate several key elements such as:
- Clear and Compelling Headline
- Your headline should grab attention and clearly convey the value you offer. Use powerful language that resonates with your audience. For instance, “Transform Your Business with Professional Design Services” speaks directly to potential clients looking for impactful solutions.
- Engaging Subheadline
- Follow your headline with a subheadline that provides more detail about your services. This could include specific benefits or unique selling points that set you apart.
- Persuasive Copy
- Write concise and compelling copy that speaks to your audience’s needs. Highlight how your services solve their problems. Use bullet points for easy readability, emphasizing key benefits.
- Strong Call-to-Action (CTA)
- Your CTA should be clear and persuasive. Use actionable language, such as “Get a Free Quote,” “Download My Portfolio,” or “Schedule a Consultation.” Make the CTA button prominent and easy to find.
- Visuals and Multimedia
- High-quality images, videos, or graphics can enhance your landing page. Use visuals that reflect your brand and showcase your work. A video introduction can be particularly engaging.
- Testimonials and Social Proof
- Including client testimonials or case studies can build trust and credibility. Showcase positive feedback from previous clients to reassure potential customers of your expertise.
- Contact Form or Lead Magnet
- Offer something valuable in exchange for visitors’ contact information, like a free consultation or an eBook. Include a simple form for easy submission.
Step-by-Step Guide to Building Your Landing Page with Elementor
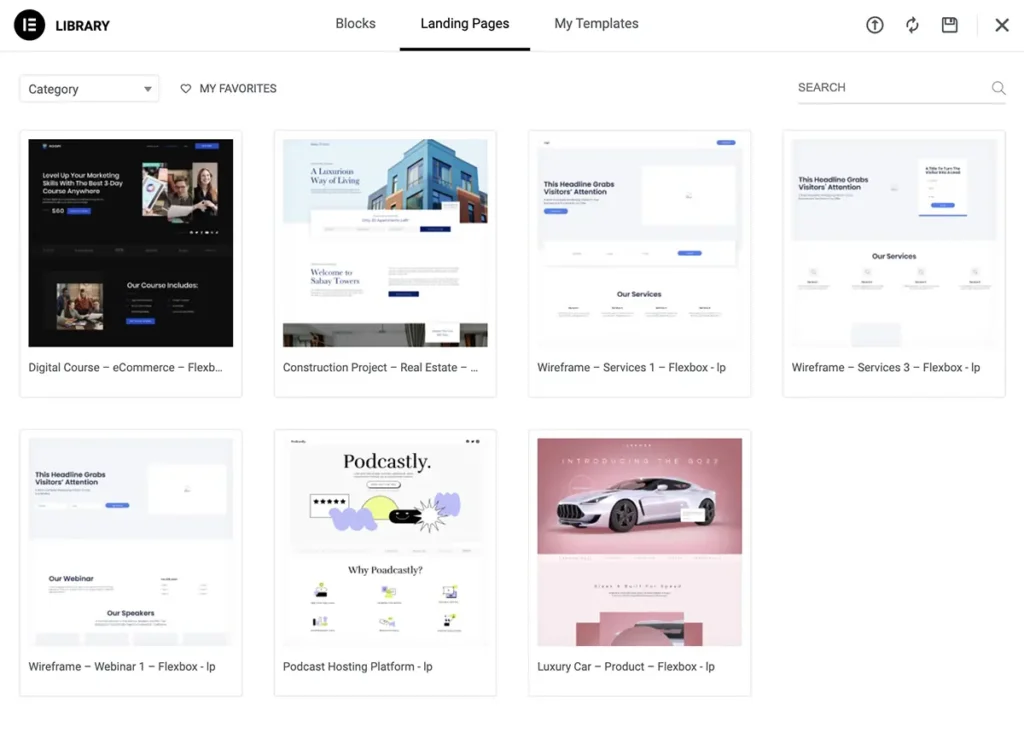
Step 1: Choose a Template
Elementor offers a variety of pre-designed templates specifically for landing pages. To choose one:
- Go to Elementor > Templates in your WordPress dashboard.
- Browse the available options and select a template that fits your style and purpose.
- Click Insert to start customizing the chosen template.
Step 2: Customize Your Design
Once you’ve selected a template, it’s time to customize it:
- Edit the Headline and Subheadline: Click on the text element to edit. Ensure your messaging is clear and compelling.
- Adjust Fonts and Colors: Use Elementor’s design settings to choose fonts and colors that align with your brand identity. Aim for a professional look that enhances readability.
- Arrange Sections: Drag and drop sections to create a layout that flows well. Keep your most important information at the top.
Step 3: Add Essential Elements
Incorporate the key elements discussed earlier:
- Text Widgets: Use text widgets for your copy. Break up large blocks of text to maintain readability.
- Image Widgets: Add high-quality images that represent your work. Ensure they are optimized for web use to avoid slow loading times.
- Button Widgets: Create CTA buttons using Elementor’s button widget. Customize the button text and link it to the desired action.
Step 4: Optimize for Mobile
With a significant amount of web traffic coming from mobile devices, ensure your landing page is responsive:
- Click on the responsive mode icon at the bottom of the Elementor editor.
- Preview how your page looks on different devices (desktop, tablet, and mobile).
- Adjust elements as needed for optimal viewing on smaller screens.
Step 5: Optimize for Conversions
After designing your page, consider the following optimization strategies:
- A/B Testing: Experiment with different headlines, CTAs, and layouts to see what resonates best with your audience. Elementor integrates with A/B testing tools, making this process easier.
- Use Analytics Tools: Implement tools like Google Analytics to track visitor behavior on your landing page. Monitor metrics such as bounce rate and conversion rate to identify areas for improvement.
SEO Best Practices for Your Landing Page
To ensure your landing page is discoverable, incorporate basic SEO best practices:
- Keyword Research: Identify relevant keywords that your target audience is searching for. Use tools like Google Keyword Planner or Ubersuggest to find suitable terms.
- On-Page SEO:
- Include your target keyword in the page title, headings, and throughout your content.
- Optimize your images by using descriptive file names and alt text.
- Write a compelling meta description that includes your target keyword and encourages clicks.
- Mobile Optimization: Ensure your landing page is mobile-friendly, as search engines prioritize mobile-optimized sites.
- Page Speed: Optimize your landing page for fast loading times. Use image compression tools and minimize the use of heavy scripts to improve performance.
Final Touches and Launching Your Landing Page
Before launching, review your landing page for any errors or inconsistencies:
- Proofread Your Content: Check for grammatical errors, typos, and clarity. You may want to use tools like Grammarly to help with this.
- Test All Links: Ensure all buttons and links lead to the correct pages and functions properly.
- Preview Your Page: Use Elementor’s preview feature to see how your page looks before publishing.
Once everything looks good, click Publish to make your landing page live!
Promoting Your Landing Page
After launching your landing page, it’s time to drive traffic to it. Consider these strategies:
- Social Media: Share your landing page on social media platforms where your target audience spends time. Use eye-catching visuals and engaging copy to encourage clicks.
- Email Marketing: If you have an email list, send a newsletter announcing your new landing page. Highlight its benefits and encourage recipients to visit.
- Networking: Share your landing page with fellow freelancers and industry contacts. Word-of-mouth referrals can lead to new clients.
Measuring Success
To gauge the effectiveness of your landing page, monitor the following metrics:
- Conversion Rate: Track the percentage of visitors who complete your desired action, whether it’s signing up for a newsletter or requesting a consultation.
- Bounce Rate: A high bounce rate may indicate that visitors aren’t finding what they expected. Analyze your content and design to improve engagement.
- Traffic Sources: Use analytics tools to see where your visitors are coming from. This can help you identify which promotional strategies are most effective.
Conclusion
Using Elementor for creating high-converting landing pages for freelancers is definitely possible. In fact, creating a high-converting landing page with Elementor can greatly help your freelance business. By understanding your audience, incorporating essential elements, and optimizing for conversions, you can attract more clients and showcase your services effectively.
Take the time to experiment with different designs and strategies, and don’t hesitate to make adjustments based on performance data. Start building your landing page today, and watch your freelance career thrive!